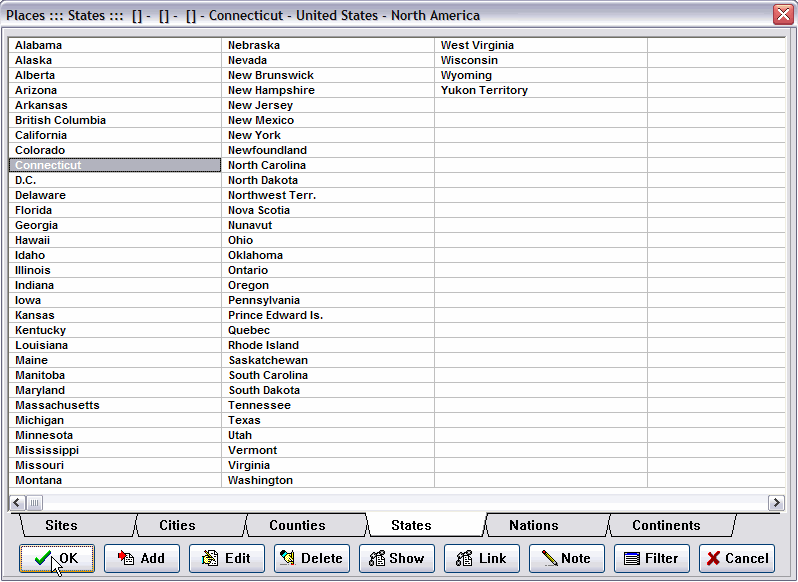
This is the Places window, and its structure tells you a lot about the tables. There are six pages of Places, titled as shown on the page tabs. They are arranged in hierarchical order from Sites—the smallest, or most granular, entities—to Continents, the largest and most encompassing. If you can’t see all six Places tabs, see page 5, Windows Large Fonts, in the User's Guide.
The scheme works like this: You will create Places, and “link” those Places to other Places higher in the hierarchy. Thus, the Place United States, in the Nations table, is “linked” to (encompassed by) North America, in the Continents table. Minnesota, in the States table is “linked” to United States and, by extension, to North America.
A perfect example of this scheme would be a birder’s yard. Let’s say she lives in Minneapolis. She would create 181 Grove Street on the Sites page, Minneapolis on the Cities page, and Hennepin on the Counties page. (The States, Nations and Continents are already there.)
Then, she would: “link” 181 Grove Street to Minneapolis; “link” Minneapolis to Hennepin; and “link” Hennepin to Minnesota. (The States are already linked to United States, which is linked to North America.) By the way, none of those Places will ever have to be “linked” again; if our birder creates the Site “Lake of the Isles,” she will simply link it to Minneapolis.
Once this Places preparation work is done, whenever our birder records a sighting at 181 Grove Street, her Minneapolis, Hennepin, Minnesota, United States, North America, ABA Area, and Life lists are also automatically updated—with one click! With the AviSys Places Tables, she can have as many as 2,350 Places, 450 in each table, all linked together. And if she runs a report for the United States, for example, her sightings at 181 Grove Street will be included. Reports can be run for any of those 2,350 Places. Bird sightings can be recorded at any Place in any category Sites through Nations. (There are only 100 Continent Places and they are reserved by the program.)
These Places will represent your most frequently birded locations, those that you will use for reports the most frequently. As you will see later, you can also record and report sightings for an unlimited number of locations using Key Words.
Click the States page tab. You now see a full screen of the states and Canadian provinces. Note that in addition to clicking page tabs, you can use the PgUp and PgDn keys to move between pages, and the RIGHT mouse button will cycle you through the tables..
Click once on your state and click the Show button. The window shows that your state is linked to United States, which is linked to North America, just as you would expect. Click OK or press Esc to clear the Linkage window.
Click the Sites tab. Click the Add button. You are presented a text entry window. Type the name of your home, such as 1854 Hearst Dr. (up to 30 characters) and press Enter. ( Do NOT use all capitals for Place names.)
Click the Cities tab and use Add again to add your city. Do the same on the Counties page to add your county.
Click the Sites tab again. Click once on your home to highlight it. Click the Link button. Note that you can now select only tables higher in the hierarchy than where you are; i.e. Cities...Continents. You must link upward. You have been taken automatically to the Cities page.
Note that the message “Linking (your home)” is displayed at the top and a dialog describes the steps you need to do next. Double-click your city. Your home is now linked to your city. A window shows you that linkage, and also shows that your city is not yet linked.
Each linkage is a three step process:
Click once to highlight your city, and click the Link button. You are now set up to link your city to your county, so go ahead and do it. Repeat the process to link your county to your state. Note that the linkage window looks back only as far as the Place you are currently linking, It doesn’t know which linkage you did before, so it won’t show your home.
Now, go back to Sites, highlight your home, and click the Show button. You will see the complete linkage from your home to North America. These linkages are now complete, and you will never have to do them again. The more linkages you do, the fewer you will have to do in the future because the “matrix” grows.
From this time forward, when you record a bird in your yard, AviSys will also automatically update your City, County, State, Nation, Continent, and Life lists.
By the way, a Place doesn’t have to be linked to the next higher table—a Site for example, can be linked directly to a State or County.
If, in the future, you would like to change the name of a Place, you can Edit it. All listings and reports will reflect the change and all linkages will remain as before. HOWEVER, you can't change the meaning of a place -- editing "Minneapolis" to "Los Angeles" would be a dumb thing to do. Changing "The Windy City" to "Chicago" would make sense. Also, see Mass Place Change.
You can delete a Place that does not have sighting records assigned to it. If it has other Places linked to it, you will get a warning. See Mass Places Change if you need to radically reorganize your Places table.
Keyboard users: the Places Tables have “Alpha Jump.” Pressing C takes you to California, then O takes you to COlorado, N takes you to CONnecticut... Esc clears the letter sequence.
The Filter button allows you to highlight all Places that are linked to a given Place. For example, if you highlight Washington (state), and click Filter, all the Places linked to Washington will be highlighted, such as Seattle, or Olympic Peninsula. This makes it easier to work with a group of geographically related Places.
Before you get carried away adding and linking Places, please read Chapter 2, Power and Strategy. There is some good advice there about putting such locations as National Parks and wildlife refuges in the Cities or Counties category.
Now, let’s discuss how your Places should really be used. A Place is only one of the ways you can assign the location of a sighting. As you will find out later, you can just as easily assign a sighting to a location by using a Key Word in the comment. And you can run reports and listings using that Key Word location as a criteria.
Because there are only 450 entries in each table, your Sites table should be reserved for your favorite, smaller, birding locations—locations you will bird very frequently and for which you will frequently run reports. You should be similarly judicious in your use of Cities and Counties.
A bird sighting in a location of no special interest, such as at a farm in rural Ohio, should be recorded in the State category, under Ohio, or possibly under the proper county if that county is of special interest to you. It makes no sense to create a Site for a location you will only occasionally bird. You can always put more specific location data in the comment and use it later to run reports.
If a Place becomes less important to you, you can use Mass Edit and Utils | Mass Places Change to transfer the sightings for that Place to another one (probably to a State or County) and automatically insert an appropriate Key Word. Then you can delete the original Place.
In summary, AviSys Places are geographic entities that encompass other Places. When you say Alaska to AviSys, it gathers up Anchorage, Mount McKinley, The North Slope, Attu—even John Coffey’s yard in Homer. You tell AviSys where you saw a bird, and it will make sure that record shows up in all the right listings.
For a more in-depth coverage of Places, see Chapter 6, The Places Tables, in the User's guide.